
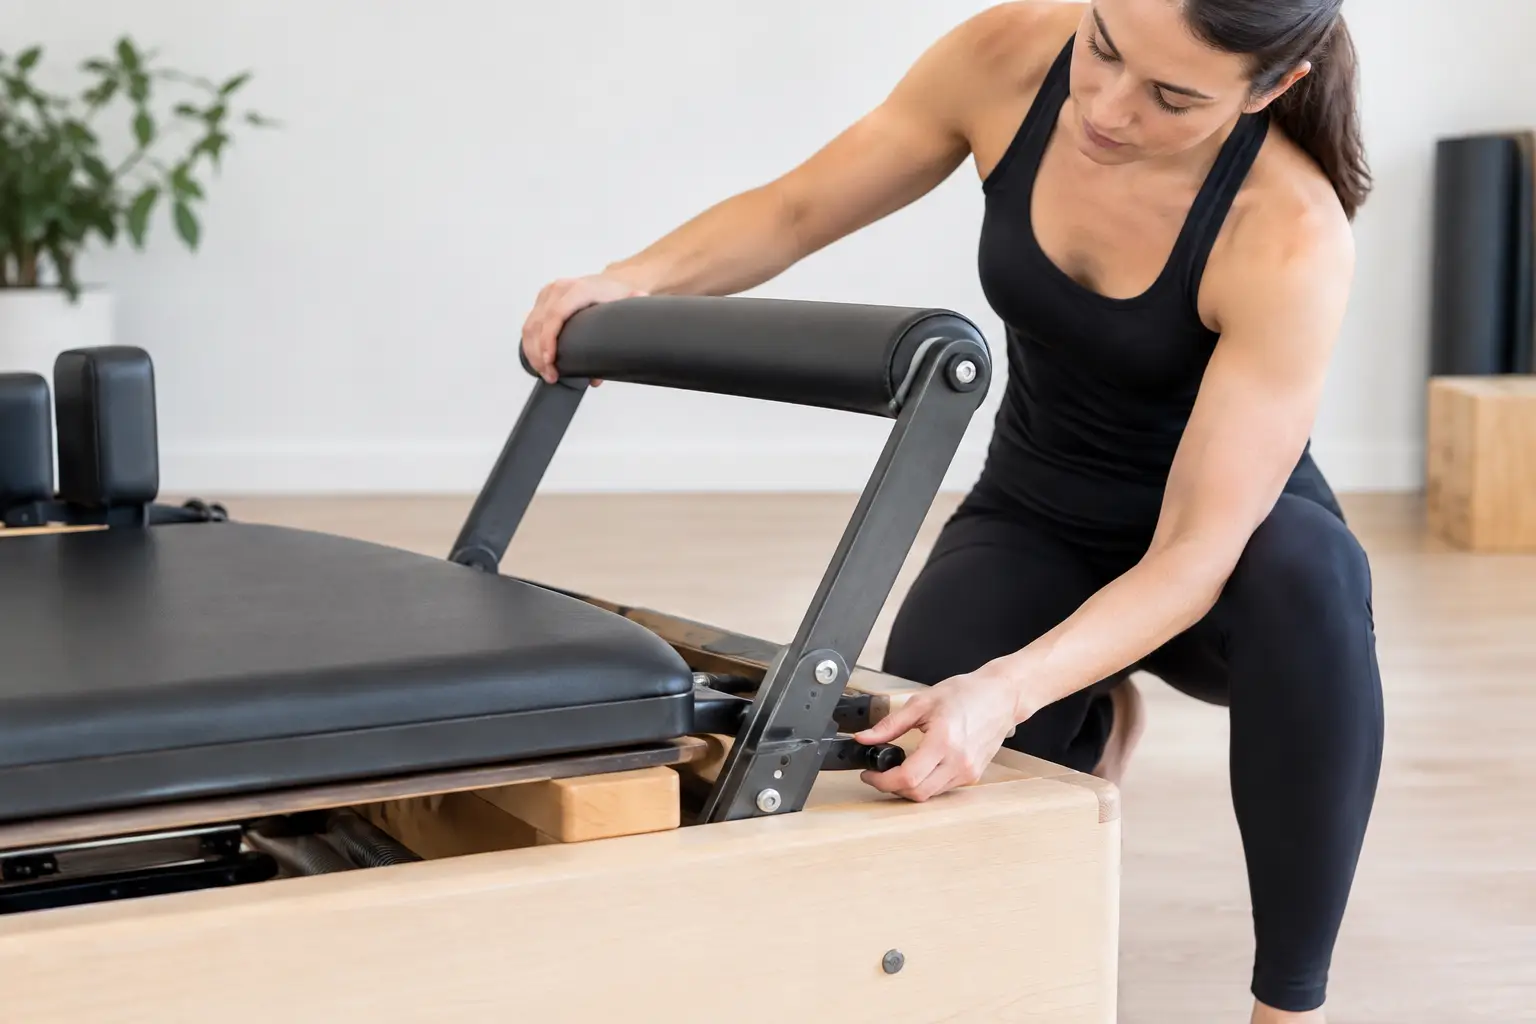
A reformer footbar can look like a simple fixed point at the front of the machine, but its position changes the starting geometry of nearly every exercise performed against it. Thoughtful reformer footbar adjustment can make footwork feel more supported, reduce awkward strain at the knees or hips, and help a home reformer fit the person using it rather than asking the person to accommodate the machine.
For beginners, the goal is not to find one “correct” footbar height and leave it there forever. The right setting depends on the exercise, your leg length and mobility, the reformer’s design, and whether you can maintain steady alignment without gripping, reaching, or collapsing through the body.
What a reformer footbar actually changes
The footbar is the contact point for classic work such as footwork, calf raises, running, bridging variations, and many seated or kneeling exercises. Its height and distance affect how deeply the hips, knees, and ankles bend when the carriage is home. That starting position influences both comfort and the muscles asked to organize the movement.
In footwork, a lower bar generally creates a more closed hip and knee angle at the start. For some people, that can feel natural and allow a grounded push through the feet. For others, especially those with limited knee flexion or hip mobility, it may feel cramped. A higher setting may create more room, but it can also encourage the ribs to flare, the pelvis to tuck, or the feet to lose secure contact if it does not suit the exercise.
Distance matters too. On many home reformers, the footbar position is linked to the frame design and cannot move forward or back independently. The carriage stopper, shoulder rests, and available footbar settings work together. This is one reason reformer specifications deserve attention before buying: two machines with similar overall lengths can feel notably different for a shorter or taller user.
Reformer footbar adjustment begins with the exercise
Before changing the bar, identify what the movement requires. The setup for supine footwork is not automatically the best setup for an abdominal series, a plank, or a kneeling lunge. In a studio, instructors often change the footbar between sequences because the purpose of the contact point has changed.
For supine footwork and running
Set yourself on the carriage with your headrest and shoulder rests arranged appropriately for the exercise. Place both feet on the bar, bring the carriage fully home with control, and assess your starting position before adding movement.
Your knees should bend comfortably without being pressed hard into your torso. Your pelvis should feel neutral or naturally supported against the carriage, not forced into a deep tuck. The feet should reach the bar without the ankles overworking or the heels lifting unintentionally. If your hips pinch, your knees feel compressed, or you cannot keep your spine comfortably long, try another manufacturer-approved bar position or reassess the carriage stopper setting if your model offers one.
A deeper bend is not automatically better. More range only has value when you can control it. For many home users, a slightly less compressed starting position supports better tracking at the knees and a more consistent connection through the whole foot.
For bridging and hip work
When the feet are on the footbar during bridging, the bar should allow you to press evenly without pushing the carriage away as you lift. If the bar is too high or low for your proportions, you may feel your hamstrings cramp, your knees drift apart, or your low back take over.
Check that the knees point in the same general direction as the second and third toes. The exact stance width can vary, but the thighs should not need to grip excessively to stay organized. If you need to curl your toes tightly around the bar for security, pause and revisit both foot placement and bar height.
For planks, kneeling work, and standing variations
These positions need extra care because the footbar may be used as a hand support rather than a surface for the feet. A setting that is comfortable for footwork can place the wrists or shoulders in an unfavorable angle during a plank or kneeling sequence.
Choose the bar position specified for the exercise in a reliable class or your reformer manual. Then test the setup with light spring resistance before loading it fully. In weight-bearing work, a locked footbar and stable carriage matter more than creating the deepest or most demanding variation.
How to adjust the footbar safely
Reformer footbar mechanisms vary widely. Some have a fixed bar with one practical position. Others use several notches, rotating brackets, or an adjustable system that changes height and angle. Never assume a mechanism works like the one you used in a studio.
Start by removing your body weight from the equipment. Bring the carriage fully home, make sure it is controlled by sufficient spring tension, and step off the reformer before moving the bar. Use both hands when the design calls for it, keeping fingers clear of hinges, brackets, and locking points.
Once positioned, confirm that both sides are seated evenly and that any pins, latches, or locking hardware are fully engaged. Give the bar a measured test press before beginning the exercise. A bar that looks aligned but is not fully locked can shift unexpectedly under load.
Avoid forcing a bar into place. If it will not move easily, check the manual for the correct sequence. On some designs, springs must be disconnected or the carriage must be held in a specific position before adjustment. Forcing the mechanism can damage the equipment or create a safety problem.
Use body feedback, not just visual cues
Visual alignment is useful, but it does not tell the whole story. Two people can look similar on a reformer while experiencing very different joint pressure. Use your body’s feedback to refine the setting.
A workable footbar position usually allows you to begin with a calm breath, level shoulders, and steady contact through the intended points of the feet or hands. During the movement, the knees should track without twisting, and the carriage should move without a sudden shove at the start or a crash at the end.
Discomfort is information, not a challenge to overcome. Sharp pain, joint pinching, numbness, or repeated instability are reasons to stop. General muscular effort can be appropriate; pressure that feels concentrated in the knees, hips, wrists, or low back is a cue to modify the setup, range, springs, or exercise.
If you are returning to movement after an injury, managing a joint condition, or working with significant mobility restrictions, personalized guidance from a qualified Pilates instructor or health professional is worth prioritizing. Footbar adjustment can improve access, but it cannot make every exercise suitable for every body.
Why footbar design matters when buying a reformer
For a home reformer purchase, footbar adjustability is more than a feature checklist item. It affects who can use the machine comfortably and how easily you can progress beyond a small group of basic exercises.
A fixed or minimally adjustable footbar can be perfectly appropriate for a single user whose proportions align well with the machine. It may also mean fewer moving parts and a simpler setup. The trade-off is less flexibility if a partner, family member, or visiting instructor has a different height, mobility profile, or training need.
Multi-position footbars can offer greater exercise variety and better fit across users, but assess the mechanism itself. Look for clear settings, sturdy locking hardware, and enough information from the manufacturer to understand how the system is intended to be used. A long list of positions is less valuable if changing them is awkward or the bar feels unstable.
Also consider the surrounding geometry. The height of the carriage, the shape and padding of the footbar, the distance to the shoulder rests, and the availability of adjustable stoppers all influence your experience. A taller user may need more carriage travel and a less compressed starting position. A shorter user may benefit from settings that prevent overreaching at the start of footwork or pulling exercises.
A practical setup check before every session
It takes less than a minute to avoid a frustrating session. Confirm the footbar is locked, the springs match the planned exercise, the carriage is controlled, and accessories are out of the way. Then take one slow test repetition before beginning the full set.
This small habit is particularly useful in shared households, where the previous user may have changed the footbar, stopper, springs, or headrest. It also helps when following on-demand classes, since instructors may use a reformer with a different configuration than yours.
The best reformer setup is rarely the one that looks most advanced. It is the one that lets you move with control, breathe normally, and repeat the exercise without negotiating around the equipment. Treat the footbar as an adjustable part of your practice, and it can make a familiar reformer feel more supportive every time you step onto it.